Radiator replacement

I replaced my Monte Carlo’s radiator today. The job wasn’t as bad as I thought it would be.

This leak started a couple of weeks before Thanksgiving. Before realizing it was an unfixable leak where the plastic side tanks met the metal center part of the radiator, I ran a can of stop leak in the system in a futile effort to make it last longer. It didn’t work, and it lately got to the point where I was refilling the reservoir every other day.

I had to do this today (Saturday, Dec. 8) because the weather is turning cold and rainy tomorrow (Sunday, Dec. 9).

Here’s how I started out:

45 minutes later, it’s out. Here’s the condenser:

The old radiator and the new one on the box:

I had to take some clips and parts off the old one and put it in the new one. One of the parts was the coolant level sensor. It was full of “mud”:

This “mud” is apparently common in systems running GM’s orange Dexcool coolant. As an aside, this coolant is commonly blamed for many problems. My gut feeling is that Dexcool’s faults are badly overblown, and at worst, may be responsible for a small increase in problems only with certain vehicles–such as 3.1L engines eating intake manifold gaskets (part 1, part 2)!

The new radiator is installed, and all parts are back in place:

I saw this notch in the radiator:

It turns out it only dug into the fins, not the tubes, and the old radiator had it, too. I guess it allows the radiator to flex laterally? While aluminum allows for far more efficient radiator design, it is more rigid and less bend-tolerant than older brass radiators.

Refilling the radiator in these cars involves opening some bleeder screws in the engine. I think it is this way because, due to the aerodynamic shape of the front of the car, the top of the radiator is well below the intake manifold. Therefore, you have to open the bleeders while filling and again while the engine is running to let air bubbles escape. Otherwise, the thermostat may take a while to open.

The car is back together, and the leak is gone!

A/C Fun, Part 4

(This is continuing from where I left off.)

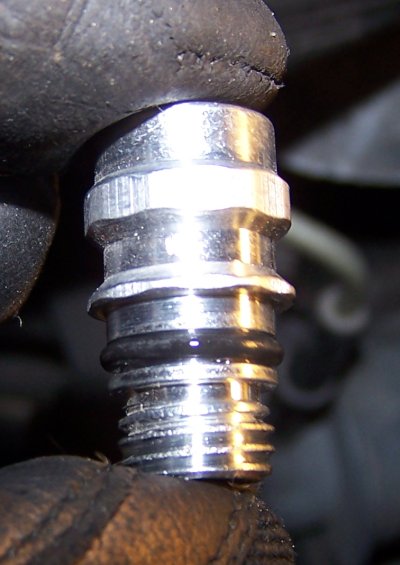
I got a replacement high side port valve and compressor oil. Here is the valve:
100_0560.JPG

The old one came right out:
100_0561.JPG

Once installed, the new port one looks like the old one, so I won’t bother you with another picture.

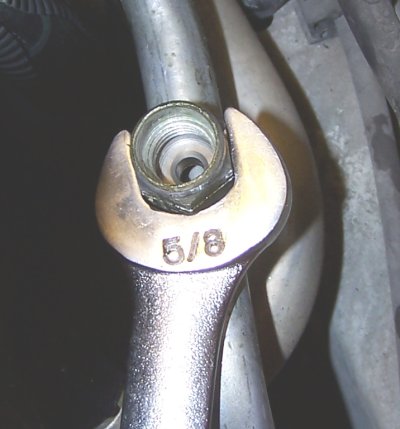
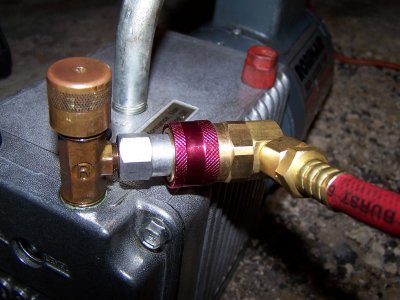
After flushing and adding new oil to the vacuum pump, I ran into another hiccup: the pump had a 1/4″ male flare fitting, but my R-134a gauge and hose set appears to have a 5/16″ female flare fitting. Argh! A last minute trip to Home Depot taught me that 5/16″ flare fittings are unusual.

Coming home defeated, I remembered that I had an extra high side service port for a R-134a retrofit. This was left over from my Nova. Luckily, it fit the vacuum pump!
100_0571.JPG
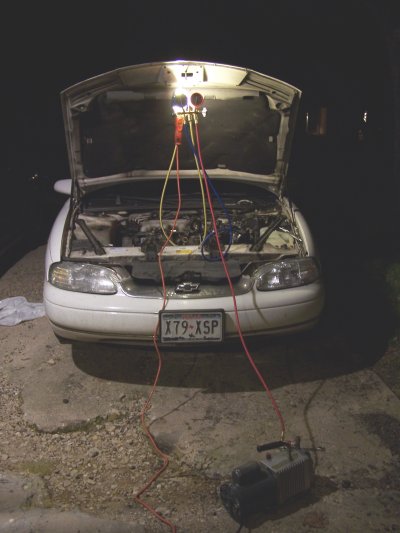
This is a weird arrangement, but it works. I pump through the red hose instead of the yellow hose. The yellow hose was hooked up to a can tap on a R-134a can.

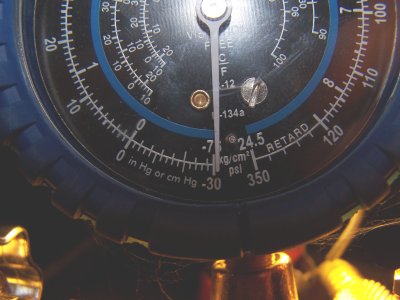
That vacuum pump is awesome. It sucked down to an indicated 31 in/Hg in a hurry:
100_0581.JPG

I doubt that was really 31 in/Hg. I’ll bet the gauge set is actually off a bit.

Here was the whole setup:
100_0569.JPG

I closed off the gauges for the leak down test. In about 15 minutes, the needle crept to around 27 in/Hg. Normally that is a bad sign; if your system is properly sealed, the vacuum won’t budge a bit. However, I didn’t have a high side port cap installed, and I wasn’t totally confident in the low side hose’s attachment to the low side port. Plus, it was getting late, I had a 9:00 AM meeting the next morning, and I needed to make something happen. So I just let that small loss be a passing grade, figuring I could check it later and hoping the leak was because of the auxiliary issues and not an actual system leak.

Factory spec for my car is 30 oz of R-134a. I sucked down two 12 oz cans, bringing me to 24 oz. But what do I do about the remaining 6 ounces?

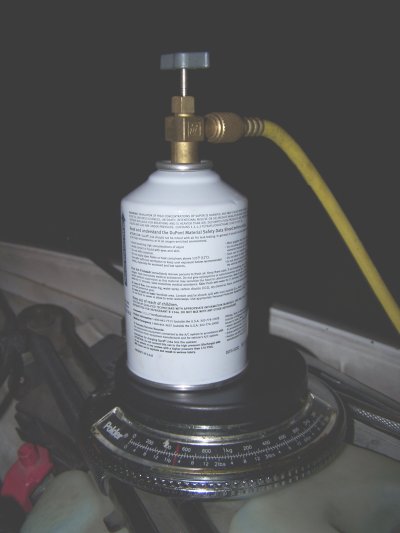
Professional refrigerant charging equipment uses a large gas cylinder, similar to propane grill cylinders, that’s on a scale. As the car’s A/C sucks in refrigerant, the scale measures the change in weight of the cylinder.

I realized I could do the same at home:
100_0585.JPG
That’s a can of R-134a sitting on a kitchen ounce scale! It worked great.

I checked my pressures over the next few weeks, and they held fine, strongly suggesting the new high side port solved the entire refrigerant leak.

But here’s the problem: the A/C didn’t feel as cool as before, especially when at a stop. The vent temperatures “felt” OK, but the car’s interior just didn’t feel the same. And it wasn’t that humid, system undercharge feeling, either.

Each time I checked the pressures, the ambient temperature was in the mid-80s. The low side pressure was just below 30, and the high side pressure was around 250. Those seem like OK pressures, so what gives?

Consulting with a guy who does a lot of A/C work, he suggested I shoot a few more ounces of refrigerant in the system. I put in the remaining 6 ounces from that half-used can, and the cooling only got a little worse. Checking pressures, the high side stayed around 250 or so, but the low side never got below the low 30s.

Today, I recaptured some of that extra refrigerant with my homemade refrigerant recovery system!
100_0871.JPG

Yup, that’s the empty R-134a can on an ounce scale to the side:
100_0836.JPG
I never disconnected it from the hose set. And it actually would not be empty; it would still have at least 30 or so PSI of R-134a in it because there is no way a full system would suck it down more.

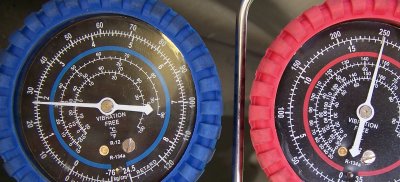
The plan was to gradually open the high side valve on the gauge set until the can had 12 oz or the low side reading got to the mid-20s. I hit both markers at about the same time. Surprisingly, even with a theoretical 6 oz undercharge, the system still did a 250 PSI on the high side!

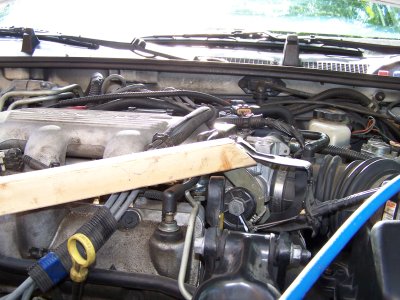
Here’s the high tech device I use to keep the engine RPMs up during A/C diagnostic operations:
100_0843.JPG

Here’s the gauge reading after removing all 12 ounces:
100_0860.JPG
I don’t get it.

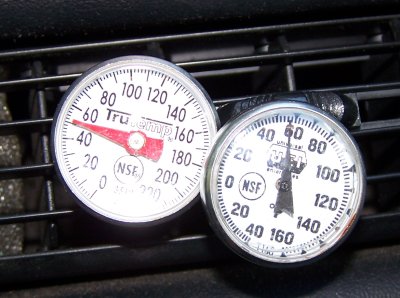
Over the last few weeks, I was complaining to a couple of people about my vent temperatures. Turns out that my thermometer was reading 5-6 degrees too high. The black-needle thermometer is the one I was using, and the red-needle one is one of our kitchen thermometers:
100_0868.JPG
I later verified both thermometers against a verified digital thermometer in the house, and the red one is spot on.

It will be interesting to see how the system runs now with a theoretical 6 oz undercharge.
By the skin of my teeth

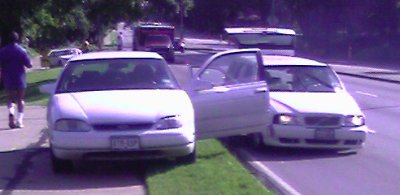
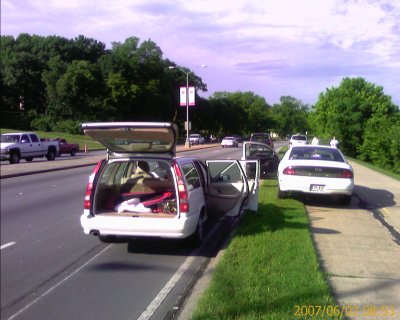
This morning, while driving on southbound Garland Road (TX 78) by White Rock Lake, I saw a careening, white Nissan Maxima headed the wrong way, barrelling down at me.

I could tell it was imminently going to swipe the Volvo wagon in front of me and was barrelling right at me from my left. So I jumped a curb and slammed on my brakes.

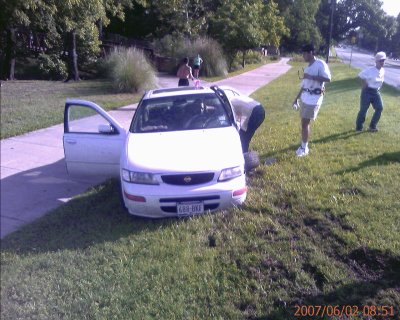
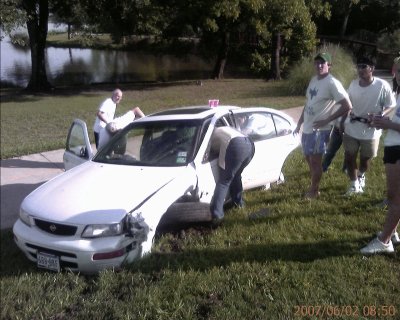
I ended up halfway on grass and halfway on a hike and bike trail:
image_00038.jpg
(All pictures are from my cell phone and have poor color balance.)

Luckily, no runners were in my path! I took longer than the Volvo to stop because the grass was wet with dew. Thank God for antilock braking!

If you look closely, you’ll see a Toyota Highlander about 100 feet in front of me. It also had to jump the curb. I guess the lady in the Volvo wasn’t paying good attention; she could have avoided the crash if she got off the road, although I may have then run into her?

Here’s where I launched off the curb:
image_00052.jpg
One of my left wheels did that.

I barely missed the careening Maxima.

Once I realized I was OK, I jumped out of my car and checked on the lady in the Volvo. She was dazed and just wanted out of her car. She couldn’t open her driver’s door:
image_00040.jpg

Seeing that no immediate action was needed, I called 911. I had to ask her twice to shut off her engine as I was on the phone; she was too startled to remember to do that.

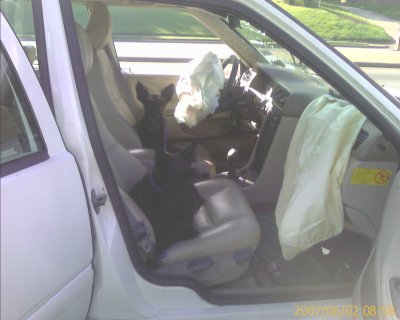
Fortunately, she was totally unharmed. Her dogs were also startled and unharmed:
image_00047.jpg
The Maxima’s driver appeared to be in more trouble. As soon as I was comfortable that the Volvo lady was OK, I asked a bystander to help her with her dogs so she could get out. I then went to the Maxima.

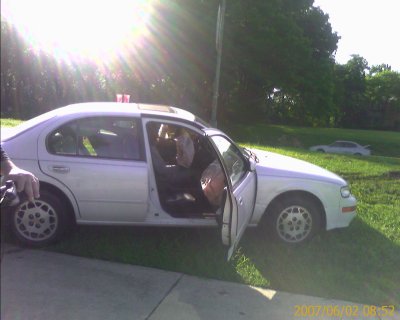
The Maxima ended up doing a 180:
image_00030.jpg

Plenty of people were attending to the guy by the time I got to him. At first, I thought his head was bleeding, but it turns out the guy’s rasta-style dreadlocks were hanging over his shoulder. He was shaking and in apparent mild shock. Bystanders were reassuring him. Since he looked OK, I didn’t interfere. His passenger compartment was intact:
image_00034.jpg
He was complaining of foot pain. That wasn’t surprising given the impact location:

image_00027.jpg

Anyone need a coil spring?
image_00057.jpg
(It’s right in front of the car.)

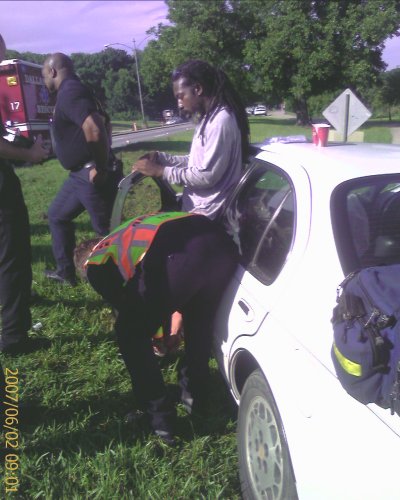
I asked the guy in the green cap to wait for the ambulance and flag it down.

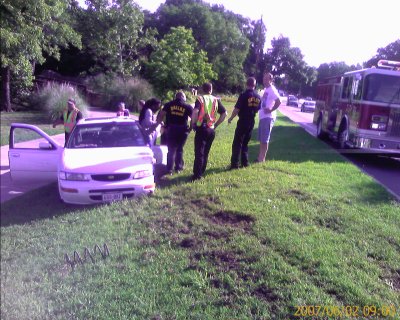
Based on the timestamps in the picture, I guess the fire truck didn’t arrive until about 5-6 minutes after the crash, and the ambulance was about 1 minute later. This surprised me since the fire station is just a mile away, up the same road. But maybe that’s normal response time?

The paramedics got the guy on his feet, so I guess he was OK?
image_00059.jpg

The only cop to show up was a traffic cop (in Dallas PD, they wear red epaulets), and he arrived roughly 10-12 minutes after the crash. That response time shocked the heck out of me.

The crash appeared to be caused by an unobservant motorist who had to make a last minute lane change to avoid a slow-moving or stopped truck. The unobservant driver swerved into the Maxima’s path. In avoiding the unobservant driver, the Maxima’s driver lost control and careened into oncoming traffic.

Since I didn’t witness this part, the cop didn’t need me to stick around. After making sure the Volvo lady didn’t need more help (the emergency personnel weren’t helping her as she was unhurt), I took off for my meeting, which was about creating a foundation for White Rock Lake Park. Incidentally, my car ended up in this very park!

Do Volvos automatically blink headlights when the airbag goes off? I am not sure that a driver could make headlights blink:
image_00070.jpg

A/C Fun, Part 3

When I left off on this thread, I had fixed an electrical problem and buttoned up my A/C system, waiting to see if any leaks materialized.

The A/C ran decently on Monday, Tuesday, and Wednesday. In fact, Wednesday morning, the system dumped lots of condensation as I backed into a parking place. That’s a good sign.

Come Thursday, the compressor won’t kick on. Wiggling the clutch wire didn’t help.

After I put the kid to bed, I took a look. The high side service port cap looked off, so I checked it further and found it was broken. The center piece was still in the port:
100_0476_resize.JPG

And notice all the green around the port? That’s the color of leak detection dye!

The plastic piece came out easily with a pocketknife.

I mixed up some soapy water:
100_0482_resize.JPG
…and threw a little on the fitting and got bubbles:
100_0493_resize.JPG

Eureka, I found a leak! The complete lack of visible dye anywhere else suggests this could be it!

The next question is how do I fix this leak? I have a Schrader valve repair kit, but there is some rubber piece over the valve that prevents me from engaging it:
100_0513_resize.JPG
(This is looking straight down the valve.)

Looking two pictures up, you can see a clear hex pattern at the base of the service port. Does the port come apart? I’m going to check with a few people and figure this one out, hopefully soon!

Now here’s what I don’t get. I had enough refrigerant for the system to work acceptably on Monday, Tuesday, and Wednesday. Today, the pressure was almost 0 PSI:
100_0504_resize.JPG

How did it lose so much refrigerant so quickly? Was the service port cover actually retarding the refrigerant flow, and it finally broke under pressure, allowing refrigerant to escape more quickly?

Stay tuned. Once I locate vacuum pump oil, I’ll get this completely fixed.

A/C Fun, Part 2

Picking up from where I left off, I diagnosed that my ’97 Chevrolet Monte Carlo’s compressor does not engage, and I suspected an electrical problem.

Yes, it was an electrical problem. But an easy one.

I had one trick to figure out. I need to test voltage at the compressor. Only problem is the power connection to the compressor clutch is frighteningly close to the electric radiator fan, and this fan comes on when I turn the A/C on.

I found the wiring diagram in my Haynes manual:
Compressor relay wiring diagram

It shows that the signal for the compressor passes through a relay, shown at right. Terminals 2 and 5 are always hot, powered by the same fuse. When terminal 1 is grounded, that closes the switch inside the relay, allowing terminal 3 to power something. In this case, when the powertrain control module grounds terminal 1, terminal 3 activates a diode on the compressor that engages the clutch. Here’s the terminals on the relay:
A/C relay
I pulled off the relay and found that the relay’s terminals 2 and 5 are hot even when the ignition is on the ON position, the engine is not running, and the A/C is off. That combination is important because I have power available to the compressor but I don’t risk danger from a running engine or a moving radiator fan.

I used a paper clip to short terminals 3 and 5, emulating what the relay would do if activated by the powertrain control module:
Shorting relay terminals

Then I pulled off the compressor clutch wire. It was really nasty, so I cleaned it up with carburetor cleaner:
A/C compressor clutch wire hanging loose

I tested for signal:
Testing compressor clutch wire
Eureka, the light came on! So I have compressor signal.

I also cleaned up the fitting on the compressor:
Compressor clutch connection

Plugging it back in, the compressor clutch clapped into place! But I also found that there is something flaky with the connection. If I move it wrong, the compressor disengages. I ended up finagling it into a position that works, but I’ll have to investigate that further later.

Now that I can turn on the compressor, I can properly charge the system. All told, I added about 20 oz of R-134a to the system. After doing that, I got these pressures at about 2000 or so RPM at 82 degrees ambient temperature:
Gauge reading (205/26)
That’s 205 PSI high and 26 PSI low. I think those were OK readings. I later found the static pressure to be 83 PSI, which corresponded to a 78 degree ambient temperature. I’m not sure how to interpret that since the actual temperatuer was about 4 degrees warmer.

But what bothered me more is when I came back to the car about 5 hours later, the static pressure dropped to 76 PSI. In retrospect, in those 5 hours, the National Weather Service recorded a 10 degree temperature drop at Love Field Airport, and the engine bay cooled down significantly. Those alone could fully explain the problem.

Still, doing my due diligence, turned off all the lights and got out my UV lamp and checked for leaks. For a reference point, I checked the UV overspill on the low side port where I injected it:
UV dye on service port
The dye puts off a clear yellow color.

I checked all around the compressor and fittings and lines and couldn’t find any evidence of dye:
Compressor in UV light

Seeing no leaks, I added a few more ounces of R-134a to the system and called it a day. I’ll check the system once again tomorrow to verify that it has plenty of refrigerant and button the system back up.

My plan for now is to just run it until I notice cooling problems. At that point, I’ll verify pressures again and check for leaks.

I do have one theory for why this all happened, although I think it is wishful thinking. My low pressure service port had no cap. It is theoretically possible that debris got in there and caused a slow leak.

Over the next couple of weeks, I’ll find out if that is the case.